1: Pre-Installation Preparation
After months of community-driven development through Preview, Alpha, and Beta phases, deepin 25 is officially released today! Centered around the theme "Embracing the New," it brings four major innovations, over 1,000 improvements and fixes, offering developers and users a more stable, smoother, and more flexible open-source OS experience.
The installation process for deepin 25 is largely the same as deepin 23. If you're already familiar with installing deepin 23, you may skip this guide.
Note: Due to major architectural changes, deepin 25 does not support direct upgrades from deepin 23. You must perform a clean installation using the new ISO image.
If you're currently using deepin 25 beta, simply update via Control Center or terminal.
1.1 Recommended Hardware Configuration
The recommended configuration ensures a smooth user experience for daily use. The system responds quickly, supports multitasking, and handles light-to-moderate graphics tasks and video playback with ease. Most office applications and lightweight online games are also well supported.
Note: Moore Threads series GPUs are not officially supported at this time.

1.2 Preparing Your Computer
- Ensure that the target disk has more than 64GB of free space.
- If your computer has multiple hard drives, move data from one to another and use the empty one for installing deepin. This enables full-disk installation without affecting other drives.
- If your computer has only one hard disk, we recommend backing up important data (especially from the C: drive if you're using Windows) to an external hard drive.
- If you're familiar with disk partitioning on Windows or macOS, you may create a 64GB+ empty partition in advance for custom installation.
1.3 Download the ISO Image
Official deepin 25 ISO download: https://www.deepin.org/en/download/
1.4 Creating a Bootable USB Drive
Prepare a USB drive with at least 8GB of capacity. Note that the USB will be formatted during this process, so back up your data beforehand.
1.4.1 Using Ventoy
Ventoy is a popular tool for creating bootable USB drives. Simply install Ventoy on your USB drive, then copy the deepin ISO to it. You can even store multiple ISO files and select one at boot.

1.4.2 Using ISO Burning Tools
Choose a tool based on your current OS:
balenaEtcher: Works on Linux, Windows, and macOS.
Rufus: Windows only.
2: System Installation
2.1 How to Enter the Installation Menu
Before installation, enter BIOS and change the boot priority to the USB drive. This only takes effect when a bootable USB is detected and does not affect regular startup.
The most common way to enter the BIOS is by using a shortcut key immediately after powering on your computer. Some systems briefly display a hint on the screen during startup, but the window is short. On certain machines, entering BIOS requires holding the Fn key in combination with the shortcut.

2.1.2 Accessing the Installer on Mac (EFI Boot)
On boot or restart, press and hold the Option key. Select EFI boot to launch the deepin 25 USB installer.
Full tutorial for Mac (same as deepin 23): [deepin 23 Installation Guide] Installing deepin 23 Dual-Boot on a MacBook
2.1.3 Installing on a Virtual Machine
Some VMs require enabling EFI or BIOS boot mode.
Recommended resources:
- CPU: 2+ cores
- RAM: 4GB or more
- Disk: 64GB or more (required)
2.2 Live Mode (No Installation Required)
The deepin 25 ISO supports a Try Mode, similar to live CDs. It lets you test hardware compatibility (Wi-Fi, Bluetooth, etc.) before installing.

Choose "Try Deepin Desktop 25" to launch without installing.
2.3 Standard Installation Mode
This guide focuses on installing deepin 25 using the standard process.
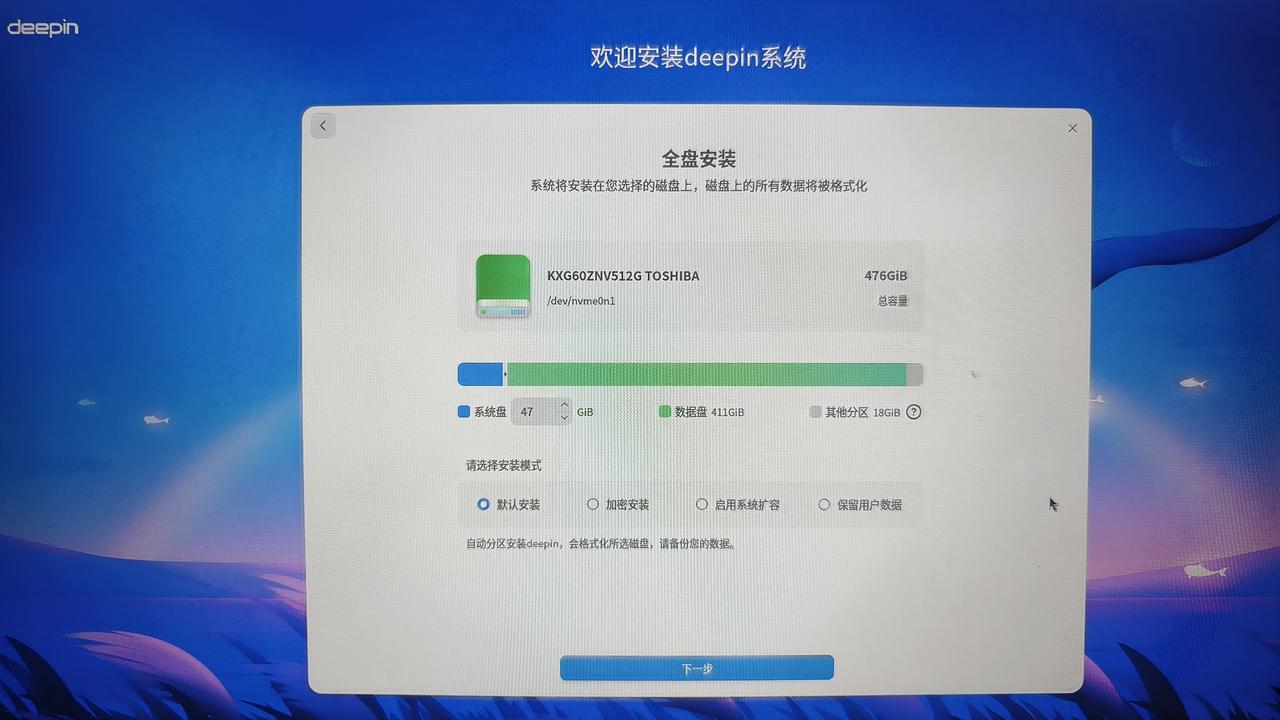
2.3.1 Full-Disk Installation
This is the simplest method. Just select one physical disk (not a partition). Adjust system/data storage sizes and install in one click.
Note: deepin 25 is not compatible with deepin 20/23 partitions. Please back up your /home data and reformat necessary partitions before proceeding.
The benefit of full-disk installation is that it automatically creates A/B partitions, which serve as system image spaces. This enables system rollback after updates via the Control Center. To use the rollback feature, the following conditions must be met:
Benefits of full-disk install:
- Full-disk installation used
- "Create initial backup" selected during install
- Updates performed via Control Center, not terminal
Rollback options will appear in GRUB after system updates.
Full guide: deepin 23 Installation Guide - Fresh Installation
2.3.2 Manual (Custom) Installation
For advanced users, custom installation offers more flexibility, such as:
- Dual-boot on a single drive
- Using LVM for expandable storage management
2.4 Safe Graphics Installation Mode
If Try Mode works but installation fails, use Safe Graphics Mode (low-res fallback mode using CPU rendering).
Note: Post-install, your discrete GPU won’t work until drivers are installed. If you're familiar with Linux, remove the nomodeset parameter in GRUB and update grub.cfg to enable driver-based GPU acceleration.
2.5 Common Installation Issues
2.5.1 Secure Boot Not Disabled
On some devices, if Secure Boot is not disabled, the system will not boot from the USB installer—even if the USB drive is correctly set as the first boot option. To fix this, enter the BIOS settings, locate the Secure Boot option, and press Enter to change its status from "Enabled" to "Disabled".
Additional explanation: What is Secure Boot? It verifies boot components (like UEFI drivers and OS loaders) against manufacturer-approved signatures to prevent unauthorized software from launching during startup.
2.5.2 UEFI Boot Mode Required
Some motherboards may not reboot properly after installing deepin if the system is booted in Legacy mode. In such cases, you need to enter BIOS, find the Boot Mode setting, and switch it from "Legacy" to "UEFI". Then, reinstall the system.
Extended Explanation: UEFI natively supports FAT32 file systems and automatically scans connected storage devices for bootable content. Any device with a FAT32 partition can be recognized as bootable. UEFI looks for a bootloader inside the /boot/efi directory—bootx64.efi for 64-bit systems or boot.efi for 32-bit systems. These files act as the loader for the OS kernel. In Linux, this is similar to core.img, but in EFI file format.
Appendix:
(3)Join deepin Telegram Group: https://t.me/+sotJGV9DtyBiNDg0